Intrusion
Intrusion Screen
Screen Overview
The Intrusion screen provides operators with real-time control of intrusion panels/areas for a selected facility. From this page you can arm in multiple modes, disarm, and temporarily or permanently exclude problem zones. The screen is optimized for quick actions and is typically used by security staff for daily arming/disarming and response.
Field Definitions
| Field Label | Definition | Notes |
|---|---|---|
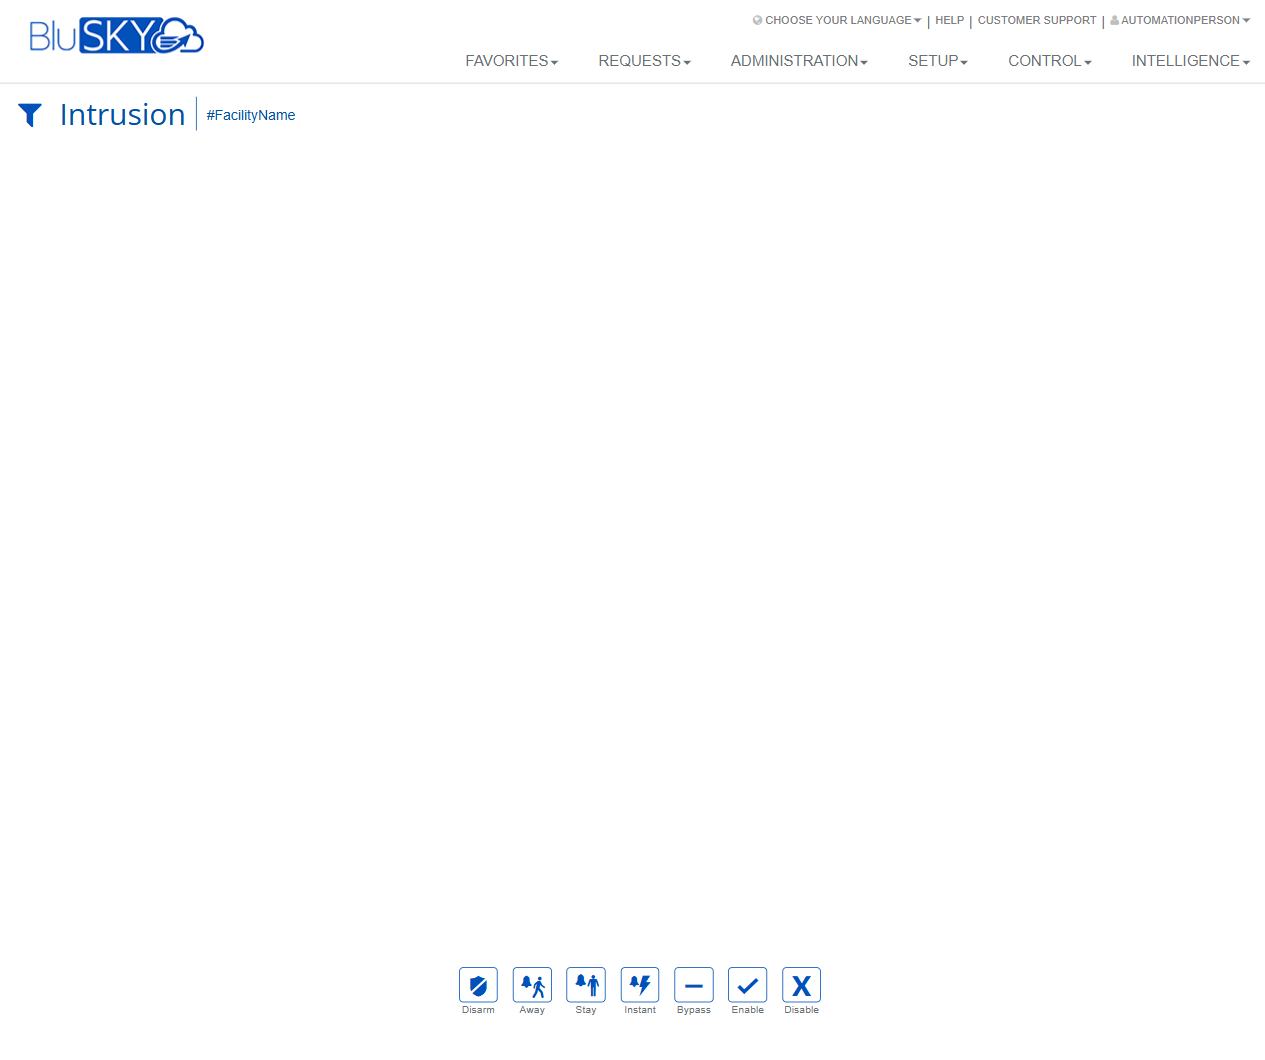
| Facility | The facility context used to scope intrusion panels/areas shown on the page. | Displayed as a tag (e.g., #FacilityName). Required to enable most actions. |
| Filter (funnel icon) | Opens facility selection or filtering options. | Use to change facilities if you have access to more than one. |
| Intrusion Workspace | The central results area where panels, areas, or zones for the chosen facility are listed. | May appear empty until a facility is selected or if no panels are configured. |
Screen Actions and Functions
- Disarm – Sends a disarm command to the selected panel/area.
- Away – Arms all configured zones (perimeter and interior) with entry/exit delays.
- Stay – Arms perimeter zones only; interior zones remain inactive. Entry delay is preserved.
- Instant – Arms as Stay but removes the entry delay (alarms instantly upon violation).
- Bypass – Temporarily excludes selected zones until the next disarm cycle.
- Enable – Re-enables zones or areas that were previously disabled.
- Disable – Takes selected zones or areas out of service until manually enabled.
Usage Instructions & Examples
- Select a Facility
- Click the filter (funnel) icon.
- Choose the desired facility so its intrusion items load in the workspace.
- Arm the Site for the Night (Away)
- Select the target panel/area from the workspace.
- Click Away.
- Confirm the command when prompted.
- Arm While Occupied (Stay)
- Select the occupied area (e.g., office perimeter).
- Click Stay to arm only the perimeter.
- Instant Arm for Closed Areas
- Select the closed area.
- Click Instant to remove the entry delay.
- Disarm in the Morning
- Select the relevant area.
- Click Disarm and confirm.
- Bypass a Faulty Door Contact
- Select the affected zone or its parent area.
- Click Bypass to allow arming despite the fault.
- Permanently Take a Zone Out of Service
- Select the zone.
- Click Disable. When repaired, return and click Enable.
System Behaviors and Edge Cases
- The workspace can be blank if no facility is selected or if the facility has no configured intrusion panels.
- Arm commands may be rejected if faults are present; use Bypass to arm with known issues.
- Instant removes entry delay; opening an entry door will immediately generate an alarm.
- Stay arms perimeter-only; interior motion detectors remain inactive.
- Disable persists across arm/disarm cycles; Bypass typically clears automatically on the next disarm.
- Commands are queued and sent to the panel; success/failure feedback appears after the panel responds.
- If the panel is offline, actions fail and an error message is displayed.
- All actions are audited in system logs with user, timestamp, and command details.
Permissions
- Access to the Intrusion screen requires a role with Intrusion Control permissions.
- Arm/Disarm commands are restricted to users granted Arm/Disarm privileges.
- Bypass/Enable/Disable require elevated operator or administrator permissions.
- Users without control permissions may be limited to view-only status or may not access the screen at all.
- Facility visibility is restricted by the user’s facility assignments.
Linked Workflows
- Setup > Intrusion Panels – Configure panels, areas, and zones for the facility.
- Control > Events/Alarms – Review intrusion events and acknowledgments after arming/disarming.
- Intelligence/Reports – Run audit and activity reports for intrusion commands and alarms.
- Administration > People – Adjust operator permissions for intrusion control.
- Requests/Work Orders – Create service tickets for zones that require repair after Disable is used.
Reference Image Links